- The client must have the Quontic Mobile App installed on their device
- Open the Quontic Mobile App
- Enter Username
- Enter Password
- Click on Login
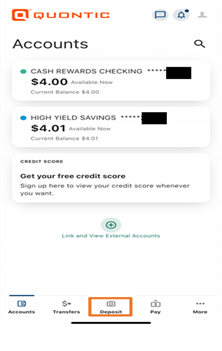
2. From Overview page, the client will click the Deposit Camera Icon
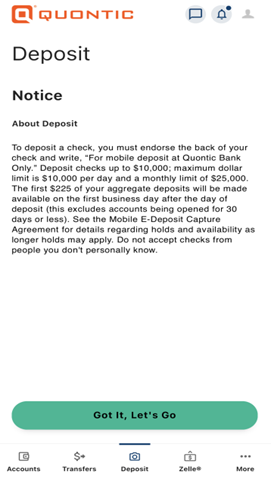
3. A notice will display advising how to endorse the check, including the restrictive endorsement instructions properly
- “For mobile deposit at Quontic Bank Only”
Once the client has read the disclosure notice, they will click on Got It, Let’s Go
4. If it is the first time the user has made a mobile deposit, they will be prompted with the Mobile Check Deposit Disclosure
- The client will click Accept once they have read the disclosure
- If the client clicks on decline, the client will not be allowed to make a mobile deposit until the disclosures are accepted
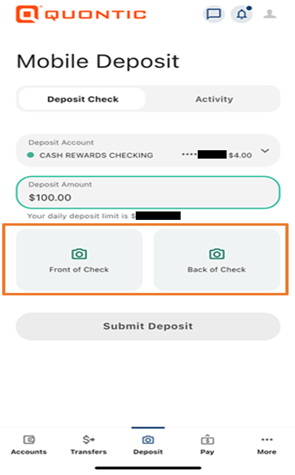
5. The client will see the mobile deposit screen and their qualifying accounts that accept a mobile deposit.
- This screen will load automatically, and the client must choose an account to proceed
- The client will need to Select One Account
6. The client will have the option to change the account if they choose the incorrect amount
- Selecting the Drop-Down Arrow on Deposit Account will display all available accounts again
7. Click on the Deposit Amount field.
- The client will be prompted to enter the amount of the check.
- The client will be prompted with their daily deposit limit
8. The client will need to take a picture of the front and back of the check
- The client will need to click on Front Check or Back of Check
- Clients can take a photo of the Front of the check or the Back of the check first
9. If this is the first time the user has made a mobile deposit, they will be prompted to Enable the Camera
- The client must Allow Camera Access by clicking OK
10. An instruction page will display on the client’s phone instructing them to place the check on a dark surface with ample light
- The flashlight may be enabled automatically
- Clients can toggle this feature by selecting the lightning bolt icon
Once the camera is open, there will be an outline for the client to align the check
- A red bar on the bottom will load as the app prepares to take the image
- The app will automatically take the photo once the check is aligned and in focus
- If the app is unable to take the photo automatically- the user will be prompted with an instruction screen advising to hold the camera closer to the check
- The client is also given the choice to capture manually
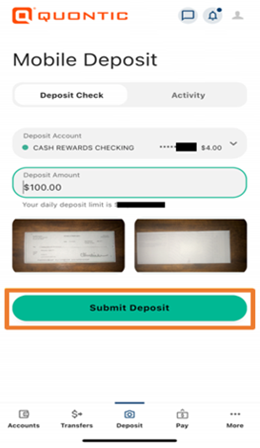
11. Once the Front of the Check image is complete the client will be returned to the Mobile Deposit screen where the client selects Back of the check and the process repeats (see Step 10)
13. The client will review the information on the Mobile Deposit screen and select Submit Deposit when they are ready
14. A confirmation screen will appear with the details of the transaction
- Clients are provided with:
- A confirmation number
- The amount of the check
- The deposit account
- The date of the deposit
- Clients can select Done to return to the app home screen
- Clients can also select View Activity
15. View Activity displays all recent pending or approved mobile deposits
16. Selecting a mobile deposit transaction will open a Deposit Details page which shows:
- The amount
- The date
- The status
- The deposit account
- The check images
- The client can select front or back image of the check
17. The client will be redirected to the full screen of the front or back of the check